


Over the years, my food photography on this blog has certainly evolved. Sometimes, it’s stayed stagnant, sometimes, I’ve even taken a step back – but now, I feel like I finally found my style (and my favorite camera lens) and I’m excited to improve upon that.
I receive many, many messages about my at-home photography setup (it’s so simple!), that I figured I’d write a post about it, in the hopes that it helps many of you aspiring food photographers find an affordable, compact, and convenient way to take photos at home.
First off, by now means am I a talented food photographer. At best, I’m an average food photographer! I have SO much to learn, but frankly, my priorities are elsewhere in my business and to me, as long as the food looks good and it’s a clean photo, I’m happy. And I hope you are too!
If you do want advice from a professional photographer, I can’t recommend Sarah Fennel’s Food Photography School enough (and use code INSPIRALIZED for $50 off the course!) I recently took this course, upgraded my lens, and I have noticed such a difference in the clarity, lighting, composition, and quality of my photos since – with just a few changes to my old ways!
My photo setup
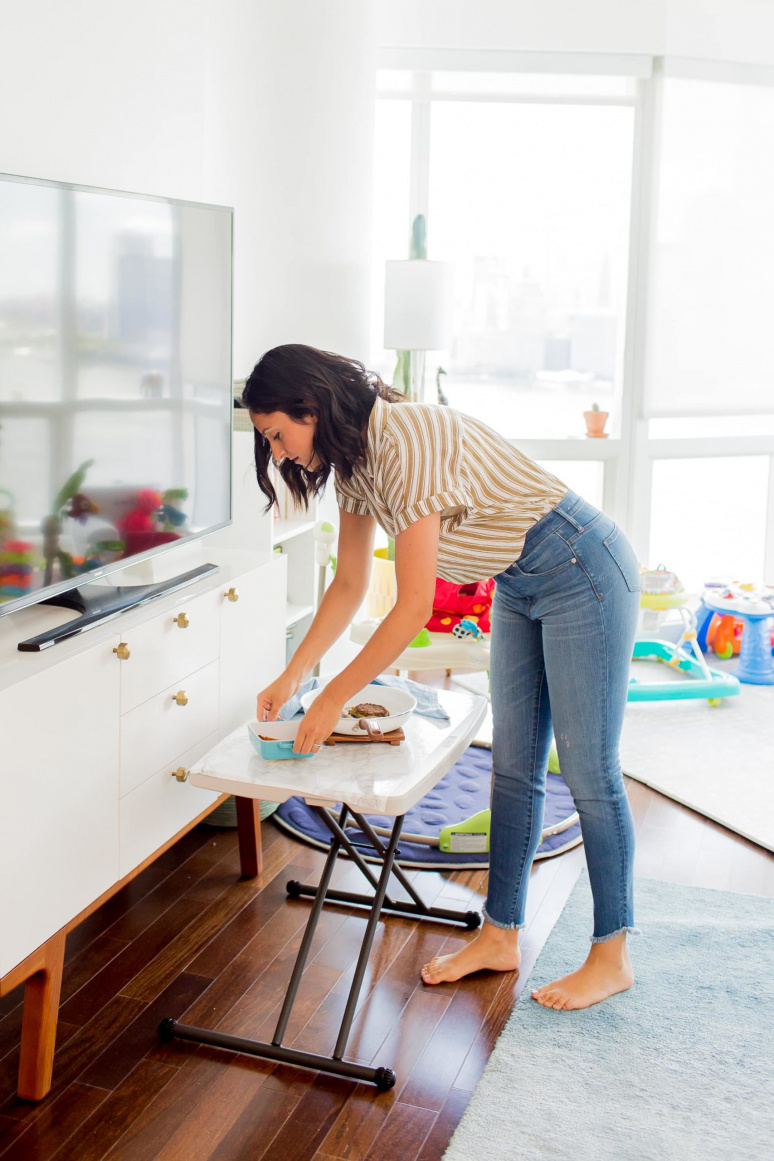
I take all of my food photos in my living room – actually, in Luca’s play area. #mombosslife. – Usually, I take take photos directly on Luca’s playmat area, because it’s closer to the main light source. I keep my lens up on a bookshelf, close to my photo area for easy access.

I have a foldable table that I’ve adhered marble contact paper to, to give the illusion of a marble countertop (and I think it works!) I take all of my photos on this table – they’re great for Instagram shots of my lunch, too – I just walk over to the table and immediately have a well-lit, marble background. The best thing about the table is that it folds up so I can hide it behind our couch or under our coffee table. It’s lightweight and the marble contact paper wipes well, so you won’t stain the surface – and if you do, you can just add another piece of contact paper on top of it (or peel the old one off!)
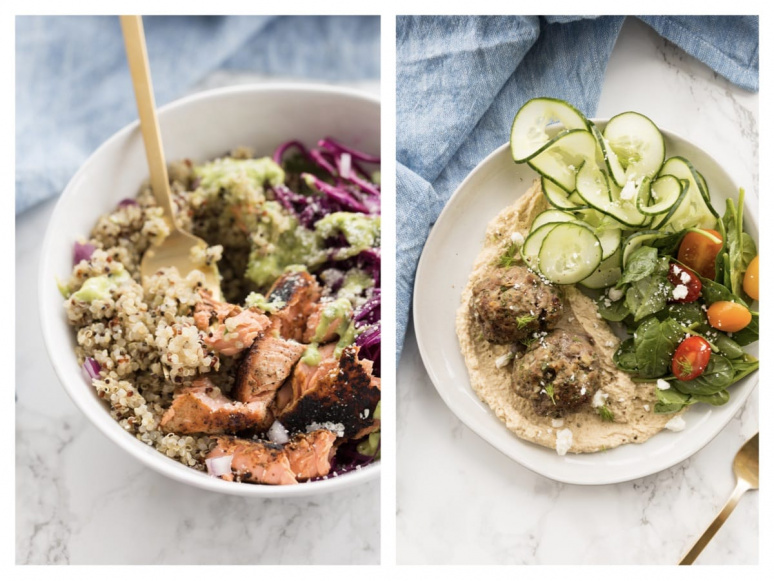
Here’s an example of what the marble contact paper looks like in photos:
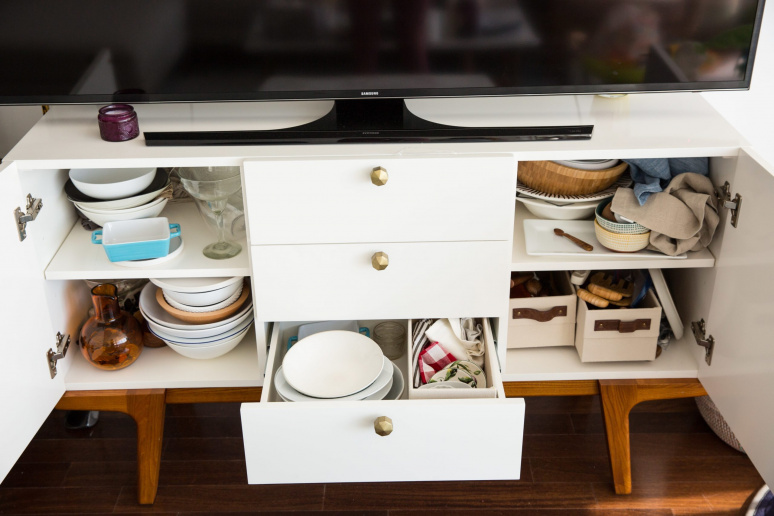
Right where I take photos, I have my TV console, which is full of all of my food photography props! I have everything in here: bowls, plates, serving wear, linens, utensils, little bowls, and so forth. I like having it right there so I can grab anything I need and have an easy cleanup.
Here’s what that looks like:
And that’s it – super simple, basic, and VERY affordable. I also have a piece of foamboard that I use to bounce light, but 8/10, I don’t use it – it’s really only necessary for those REALLY focusing on food photography professionally.
My favorite products for food photography
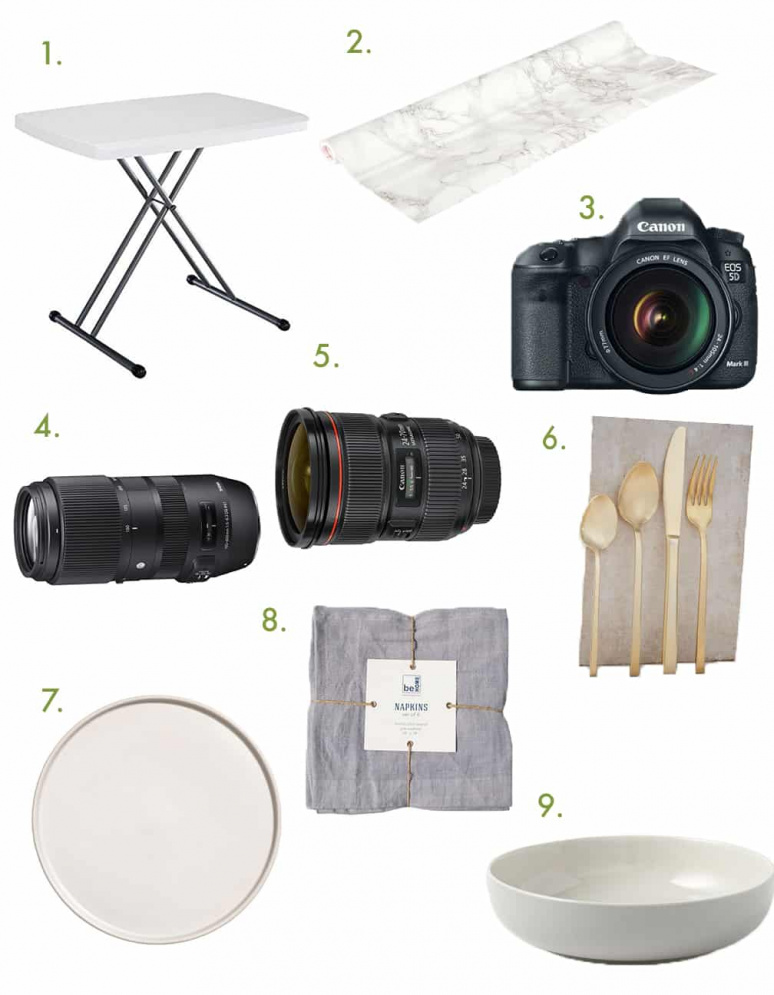
Here are the basics that I use – and some of my styling favorites!
- Photography table
- Marble contact paper for background
- Camera – Canon 5D Mark III
- Camera lens – 100mm
- Camera lens – 24-70mm
- Gold flatware set
- Stoneware plate
- Linen napkins
- Simple low bowl
I hope you found this post helpful – or at the very least, interesting! I love sharing behind-the-scenes!
comments